Welcome to our photo-sharing platform!
Let’s begin by accessing the “Photos” page. There are three convenient methods to reach the “Photos” page:
- From the main page, locate and click on the camera icon in the top left corner.
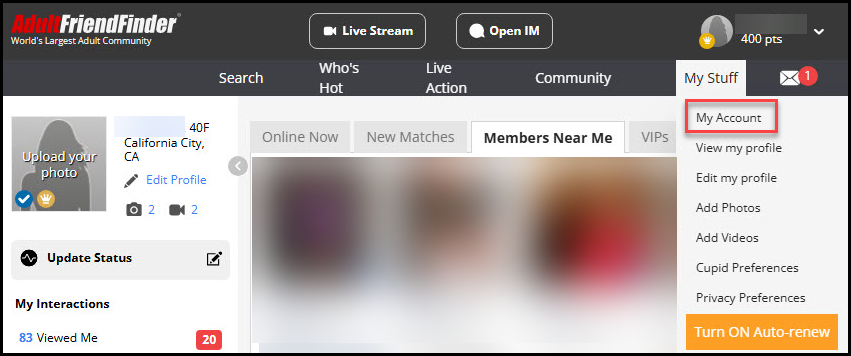
- Using the navigation bar, hover over “My Stuff” and select “Add Photos”.

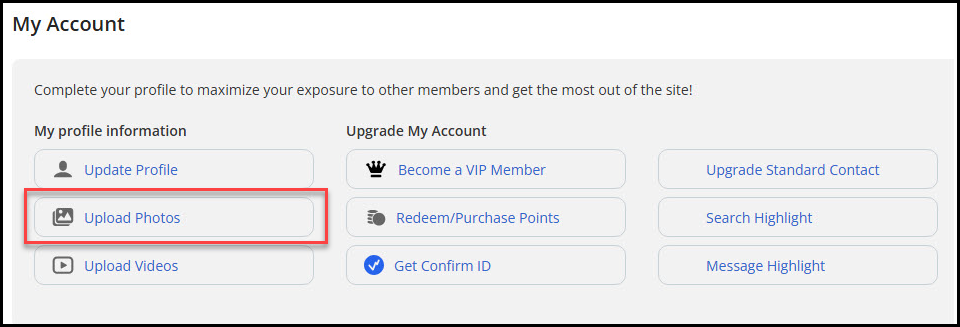
- Access account settings by hovering over “My Stuff” and selecting “My Account”. Then, navigate to the “My profile information” section and click on the “Upload Photos” link.
When uploading your first photo, it will be placed in a default album called “Profile Photos”. After uploading at least one photo to your Profile Photos album, you’ll have the option to create additional albums to organize your collection.
Note: You may upload both sexual and non-sexual profile photos. However, please ensure that you include at least one profile photo that is non-sexual and non-nude. The profile photo that other members see will depend on the content filter settings they’ve chosen.
The photo upload and edit process remains consistent across all albums as outlined below.
Uploading Your Photos
We offer three methods for uploading your photos:
- Upload by Filename:
- Click on “Upload by Filename”.
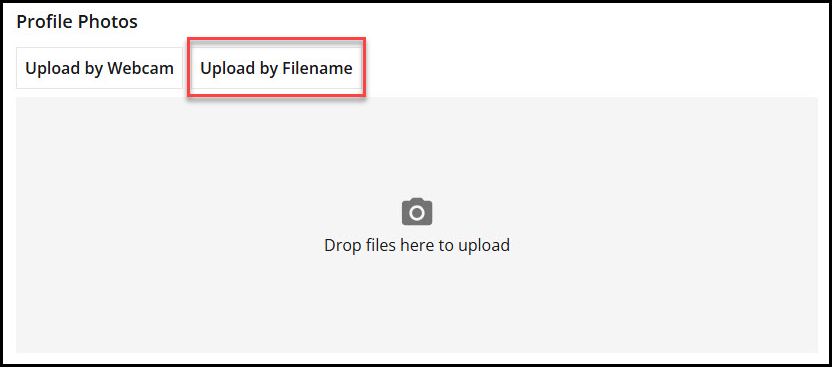
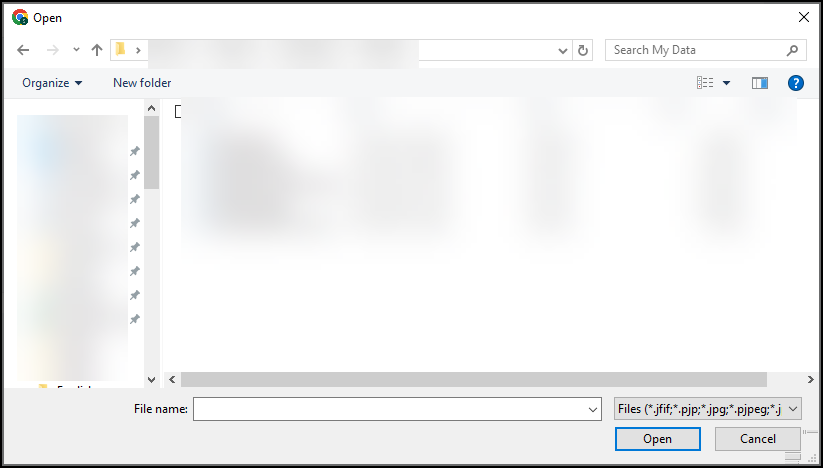
- Navigate to and select the photo file(s) you wish to upload (multiple selections are possible).
- Confirm your selection (depending on your operating system the button to confirm the selection can vary. In the example screenshot here, it’s for windows).
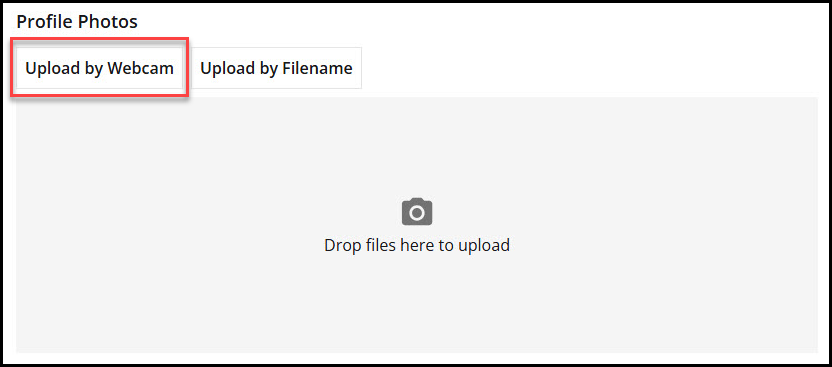
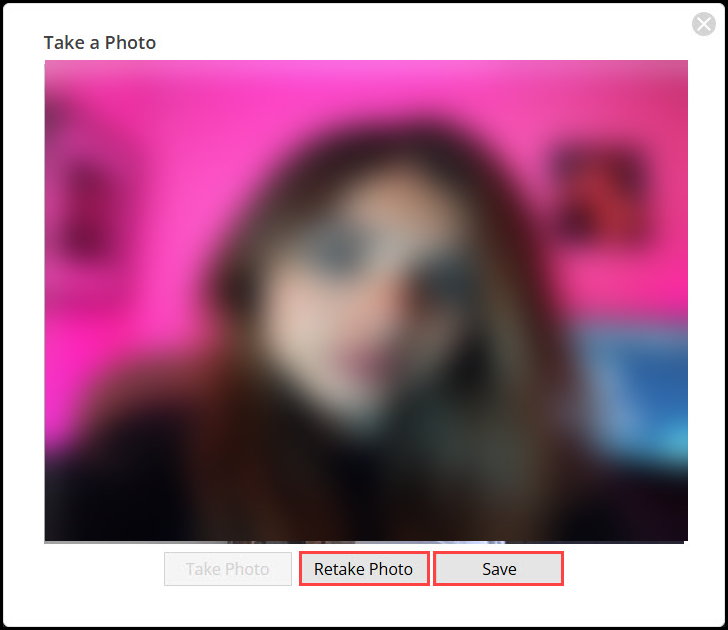
- Upload by Webcam:
- Click on “Upload by Webcam”.
- A window will appear displaying your live camera feed. (If you haven’t granted webcam permissions before, you may be prompted to do so).
- Click “Take Photo” when ready.
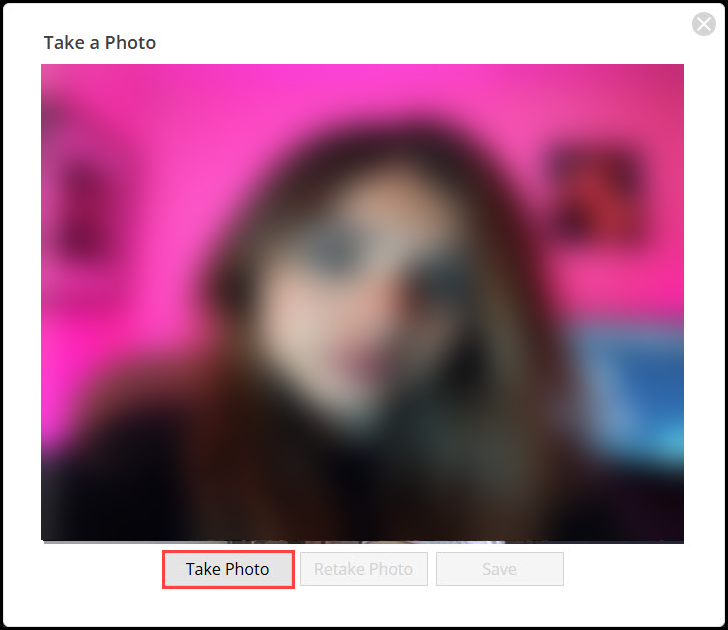
- Review the captured image; click “Retake Photo” if needed, or “Save” if satisfied.
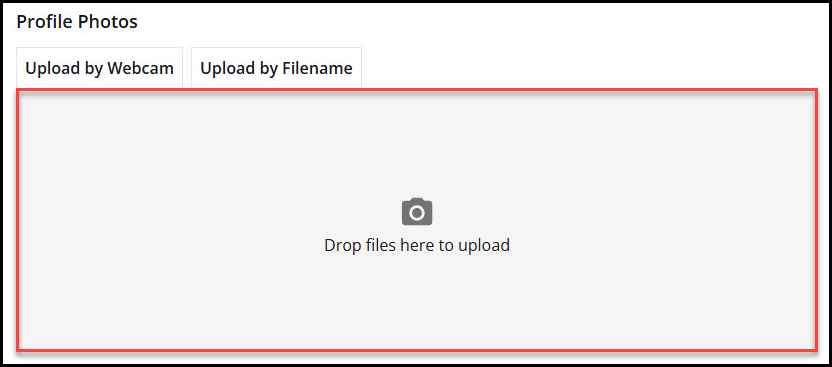
- Drop Files:
- Simply drag and drop files into the designated “Drop files here to upload” area.
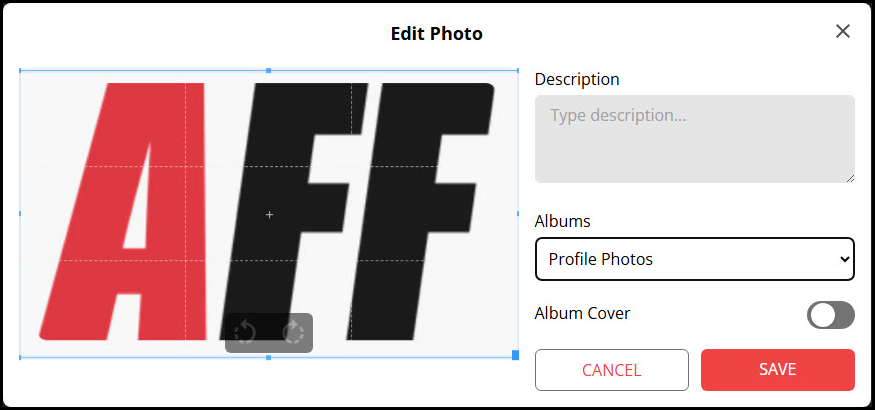
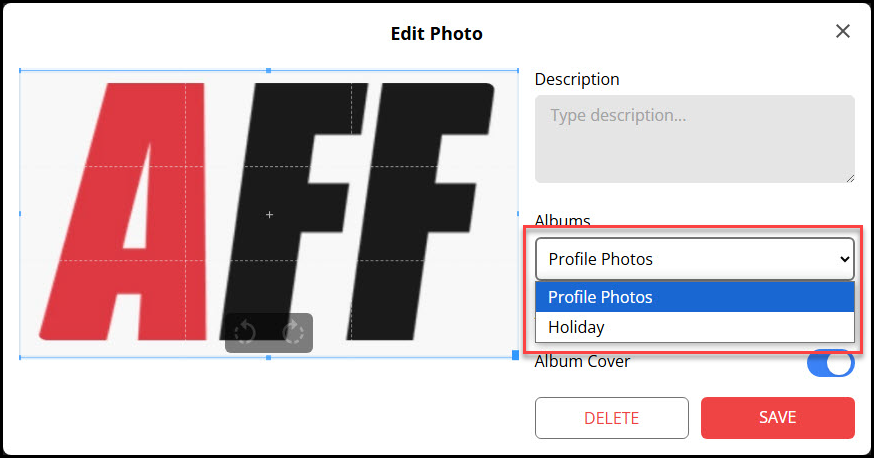
Editing Photos During Upload
After uploading, you can review and modify your photos as follows:
- Rotate the photo in 90-degree increments.
- Add a description to your photo.
- Select an album if you’ve created custom albums previously. If not, the album will default to “Profile Photos” album.
- Choose whether to set the photo as an album cover.
- Cancel the upload if desired.
- Complete the upload by clicking “Save”.
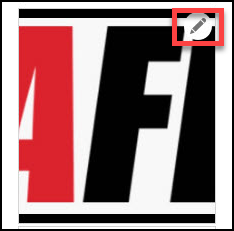
Editing Photos Later
To edit a photo later, click the edit button (pencil icon). The editing options are similar to those available during upload, with additional features:
- Allow or disallow comments.
- Delete the photo if no longer needed.
![]()
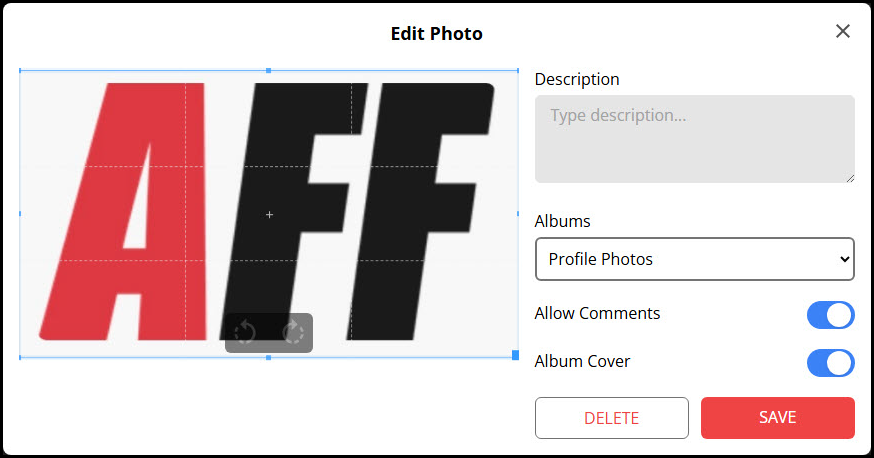
When done editing, please click on the “SAVE” button to save any changes.
Creating a New Album
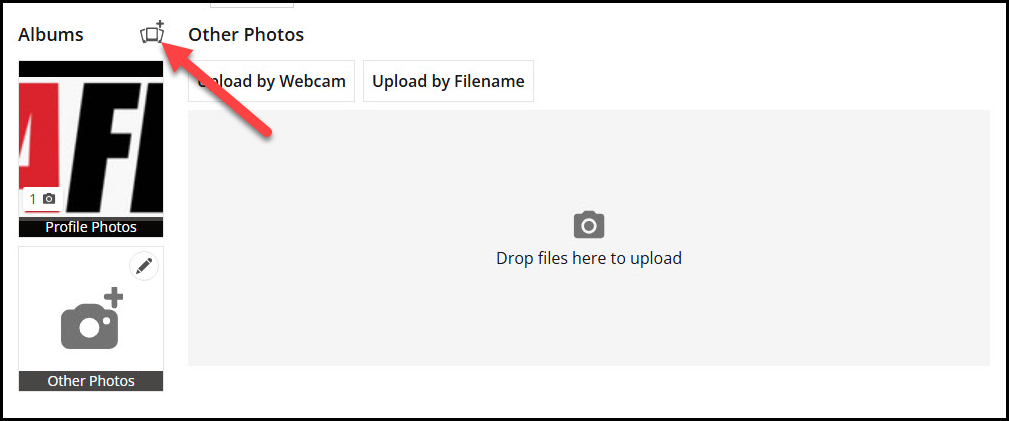
Once you have a photo in your “Profile Photo” album, you can create custom albums by clicking the “Create New Album” icon.
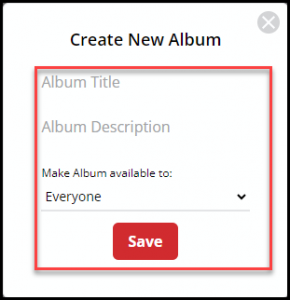
You’ll be prompted to provide:
- Album Title.
- Album Description.
- Privacy settings (who can view the album). You may choose between “Everyone”, “Friends” or “Only Me”.
Click the “Save” button when done.
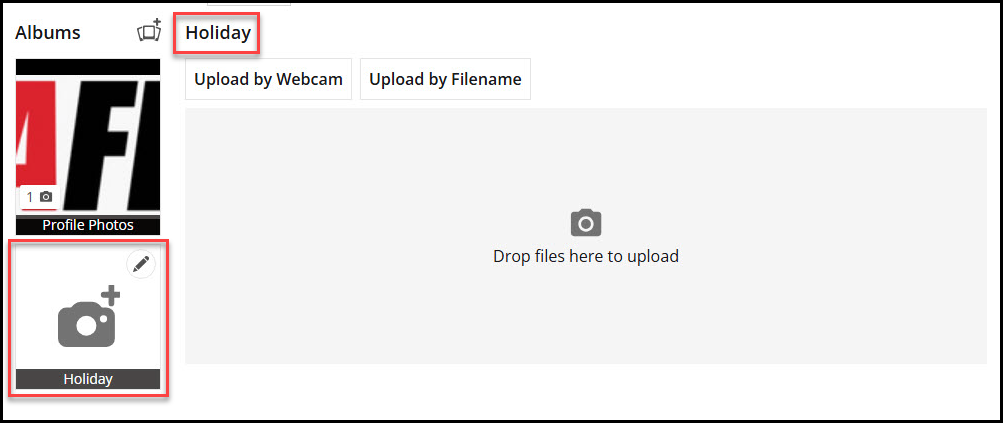
Your new album will show up on the left side of the Photo Upload page. When you click on it, the album name would be reflected at the top of the upload photos section.
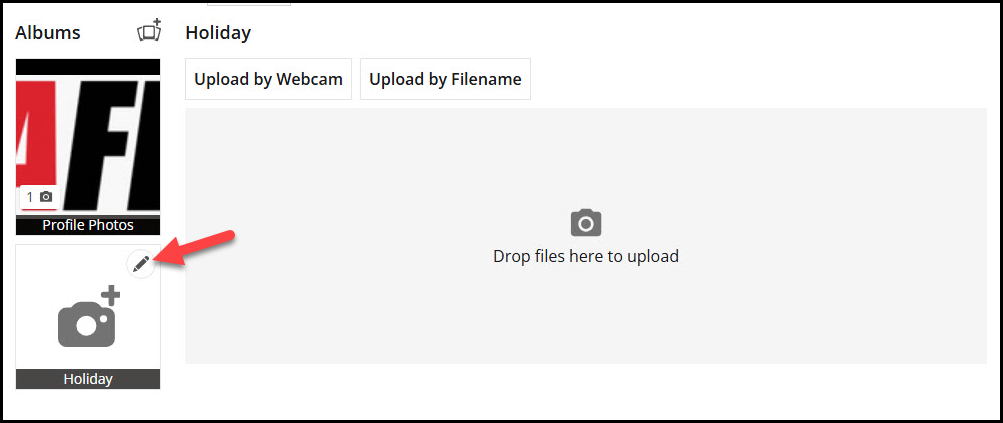
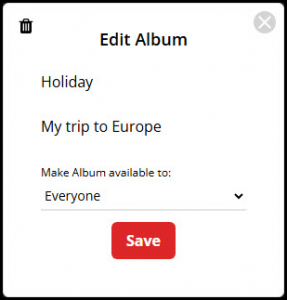
Editing Albums
To modify album settings such as title, description, or privacy, click the edit album button (pencil icon) and make your desired changes. Remember to save your modifications.
Upload Photos to your new Album
You can either select an album during the photo upload process or choose an album first and then upload photos to it. The photo upload process is the same for all albums.
Moving your Photos Between Albums
To relocate a photo from one album to another, edit the photo by clicking on the pencil icon, select a different album from the “Albums” drop-down menu and click “SAVE”.
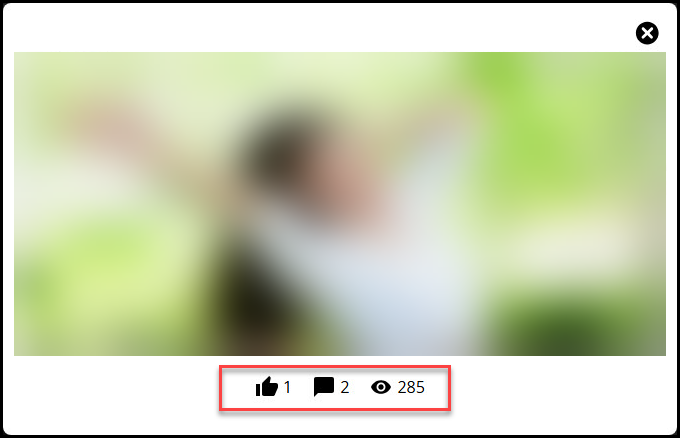
Monitoring Photo Performance
Click on a photo to view statistics such as the number of views (eye icon), likes (thumbs up icon), and comments it has received.