- Stand Out with Your Messages!
- Emphasizing Text
- Font Colors
- Link to a Blog, Advice Line Article or Group
- Link to a Place
- Link to a Member
- Link to a Photo
- Adding Bling
- Preview your Poll or Post
- Help icon
- Smilies
Stand Out with Your Messages!
Put personality into your text by clicking on one of the options in the message toolbar located under the message field. Hover over each icon to display a tool tip describing what each icon does. The following is a list of text enhancements you can use to add flair to your blog and express yourself.
Emphasizing Text
You can emphasize text by clicking on its icon in the toolbar below the message field.
Alternatively you can type the formatting tag manually. Formatting tags will have an opening enclosed in square brackets and an ending starting with a forward slash enclosed in square brackets. Enter the text you want to emphasize in between the opening and closing tags listed below:
[b] enter bold text here [/b]
[i] enter italic text here [/i]
[u] enter underlined text here [/u]
[size 1] enter small text here [/size]
[size 2] enter large text here [/size]
[size 3] enter larger text here [/size]
[size 4] enter very large text here [/size]
[size 5] enter XL text here [/size]
[size 6] enter XXL text here [/size]
[size 7] enter XXXL text here [/size]
[size 8] enter XXXXL text here [/size]
[size 9] enter XXXXXL text here [/size]
[size 10] enter XXXXXXL text here [/size]
Font Colors
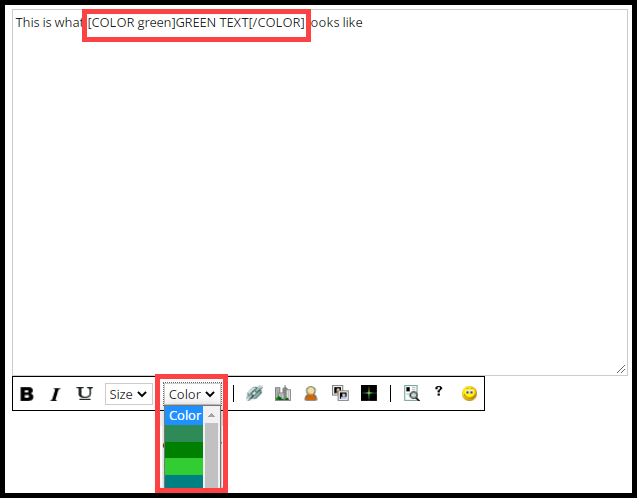
- You can change the font color by clicking on the drop down menu in the toolbar below the message field.
- Click on the text color in the “Color” drop down menu. The opening and closing formatting tags are added to the message field. Enter the text you want to emphasize in between the opening and closing tags. For example [COLOR green] enter your green text here [/COLOR]

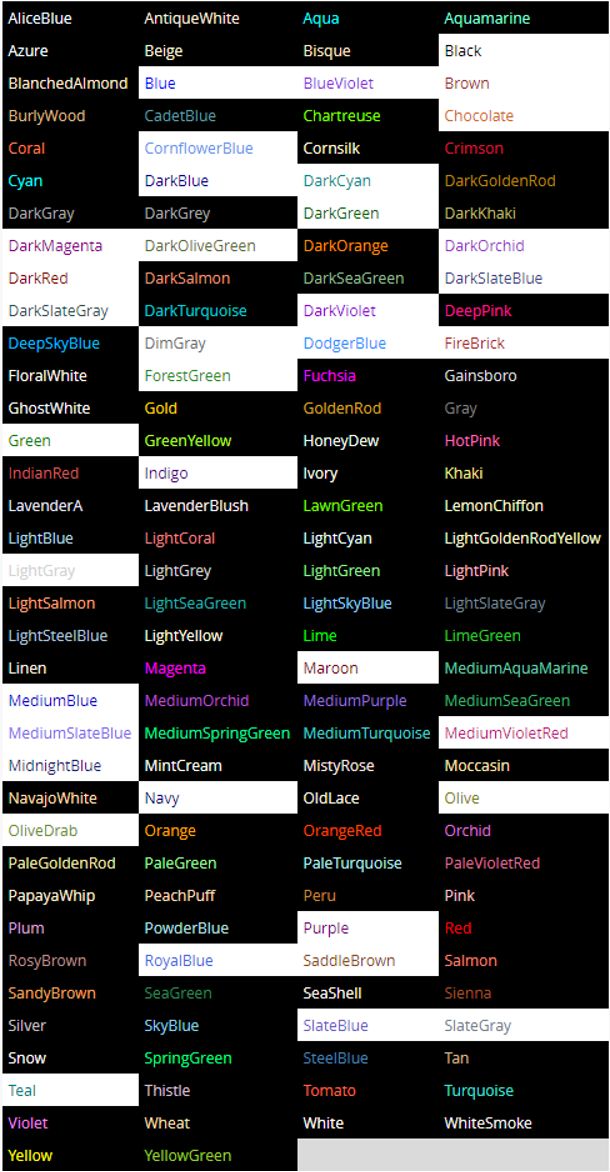
Alternatively you can manually enter the font color by entering the colors below in between the formatting tags. Remember to spell it COLOR and not COLOUR. For example:
[color blue] for blue text [/color]
[color red] for red text [/color]
[color purple] for purple text [/color], etc.
Link to a Blog, Advice Line Article or Group
- You can add hyperlinks in your blog to link to other Blogs, Articles or Groups by clicking on the link icon in the message toolbar under the message field.
- A pop up box will appear. Select one of the options in the drop down menu.
- My Pages
- Blog
- Blog Post
- Advice Line Article
- Member Article
- Groups
- Group Topic

- In the next field enter the ID number of the Blog, Article, or Group you want to link. The ID number can be found in the footer enclosed in square brackets.
- You can enter text for the hyperlink by typing next to the “Link Text” field. This step is optional. If you do not enter text in this field the link will display the title of the Blog, Article, or Group.
- Click on the “Insert Tag” button

Alternatively you can manually type tags to link to Blogs Articles or Groups by using the tags in bold font below:
- LINKING A BLOG – [blog Username] will link to the blog while showing the username as clickable. The username is used for referencing the right blog, so don’t leave the username out, as that will break the link.
- [blog Username Title] will link to the blog while NOT showing the username but showing the title as clickable.
- [blog Username text] will link to the blog using whatever text you enter after the username as a hyperlink.
- LINK TO A BLOG POST – [post 12345] will link to a specific blog post. The post number is listed in the footer of each blog post.
- LINK TO A GROUP – [group 12345] will link to a group.
- LINKING TO A GROUP TOPIC – [group_post 12345] will link to a specific group topic.
Link to a Place
- You can add hyperlinks in your blog to link to place in the Adult Directory by clicking on the Place icon in the message toolbar under the message field.
- A pop up box will appear. Enter the ID number of the Place in the Adult Directory you want to link. The ID number can be found in the footer enclosed in square brackets.
- You can enter text for the hyperlink by typing next to the “Link Text” field. This step is optional. If you do not enter text in this field the link will display the title of the place in the Adult Directory.
- Click on the “Insert Tag” button

Alternatively you can manually type tags to link to a Place in the Adult Directory by typing the place tag followed by the place ID enclosed in square brackets. Example: [place 12345]
Link to a Member
- You can add hyperlinks in your blog to link to a members profile page
- A pop up box will appear. Enter the Username of the member you want to link to in the Username field.
- You can enter text for the hyperlink by typing next to the “Link Text” field. This step is optional. If you do not enter text in this field the link will display the members’ username.
- Click on the “Insert Tag” button

Alternatively you can manually type tags to link to a members profile page by typing the member tag followed by the members’ username enclosed in square brackets. Example: [member Username]
Link to a Photo
- You can add hyperlinks in your blog to link the main profile photo of a member
- A pop up box will appear. Enter the Username of the member you want to link to in the Username field.
- Click on the “Insert Tag” button

Alternatively you can manually type tags to link to a members main profile photo by typing the photo tag followed by the members’ username enclosed in square brackets. This is the only possibility for linking a photo. Example: [photo Username]
Adding Bling
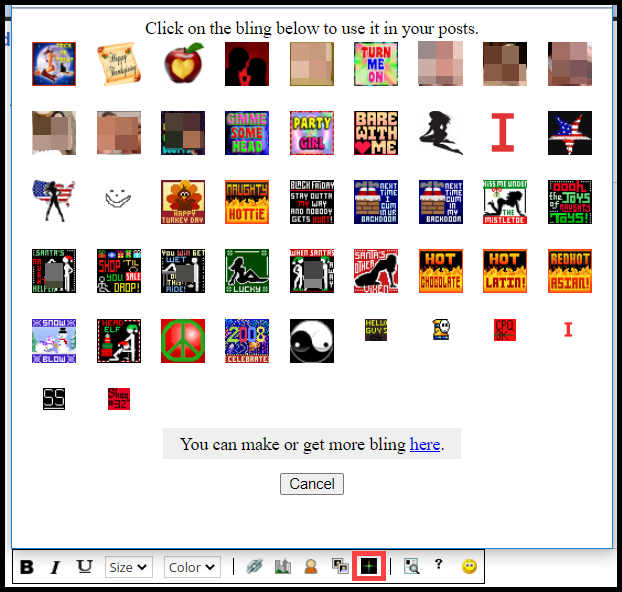
You can add bling to your blog by clicking on the Bling icon then click on the bling you want to add.

Alternatively you can manually type the bling tag followed by the bling ID enclosed in square brackets. The bling ID is the number shown below each bling in your Bling Manager. Example: [bling 12345]
Preview your Poll or Post
Click on the “Preview icon” to view a preview of your poll or post in a pop up screen so you can make corrections before adding the poll or post.
Help icon
If you are unsure of how to use the options in the Message Toolbar click on the help icon. A pop up box will appear explain how to use each icon.
Smilies
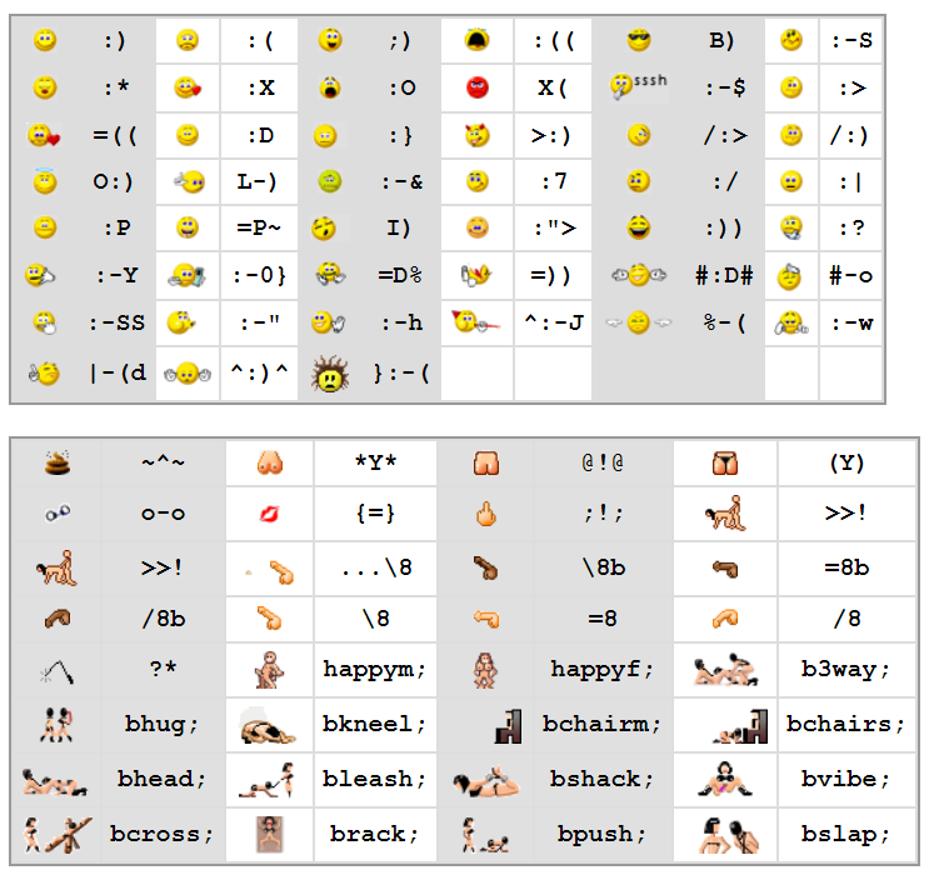
A smiley is an icon you can use to add emotion to your message. Click on the Smiley icon in the toolbar underneath the message window to add a smiley. There are 30 expressive smilies to choose from.

Alternatively you can enter a smiley by typing a series of letters, numbers or special characters. Refer to the Smiley key below and type the characters shown to the right of each image.


